5. Modules
Modules are used to define an object. It’s a very useful feature you must use in every of your projects. The principal advantage is to avoid code duplication and to have a more ridable code.
Syntax:
module Name(parameters) {

     “your code”

}
And to call the module: Name(parameters);
Example:
module Ecroue(h,r){

    difference(){

        cylinder(h,r+0.8,r+0.8);

        translate([0,0,-1]) cylinder(hauteur+2,r*0.7,r*0.7);

    }

}

Ecroue(3,4);
6. Other Functionnalities
Now you know all the basic functionalities there is a multiple of over one that can be very useful I can’t list them all but there is some that can interest you if you want to go further in openSCAD.
a. Text
To include text, you have 3 variables:
- text(“myText”,”myStyle”) include your text
- resize([x,y]) change the size of the text
- offset(number) the width of the text
syntax:
resize([30,10]) offset(0.5) text("Tutorial","Arial:style=Bold");
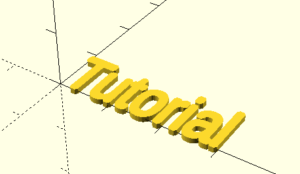
b. Minkowski
Minkowski is a cool functionality that will allowed you to do shapes that are very hard to do with difference(). It will do very elegant shapes like this one:
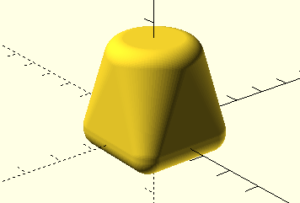
$fn=100;

minkowski() {

   hull() {

       cube([20,20,1],center=true);

       translate([0,0,20]) cylinder(1,8,8);

    }

   sphere(r=5);

}
7. Final Exercises
1) Try to reproduce the previous shape (Exercise 3) with modules. (correction)
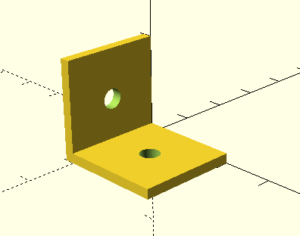
2)Do a key ring with a module for the key and on for the ring. In this key ring put text encrusted with a hull shape. (correction)
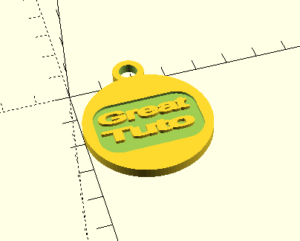
8. Conclusion
I hope you liked my tutorial and that it will help you for you 3d printing project. If you want some idea for your first shapes to print go check my creation in 3D models or on thinginverse who is a very cool website with a large database of 3D object created by the community.
I will just finish with a topic on features I would personally like to be implemented on my favorite 3D creation software. For my part it will be very simple things like scroll past end, parenthesis and brackets handle to go faster when tiping.

Leave a Reply