Category: Tutorials

  • Modelize your first 3D shape with openSCAD #Correction

    9. Correction

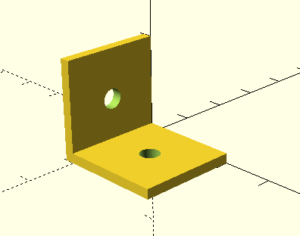
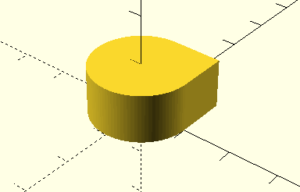
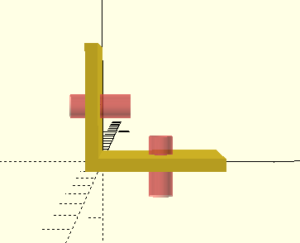
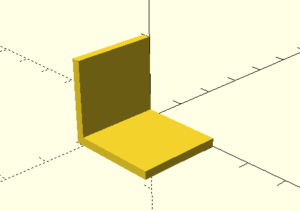
    Correction Exercise 2:

    //Exercise 2
    
    $fn = 100;
    
    translate([0,-20,0]) cube([20,20,2]);
    
    translate([0,-20,0]) rotate([0,-90,0]) cube([20,20,2]);


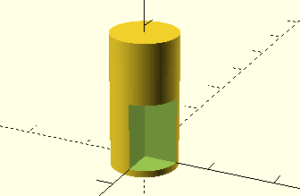
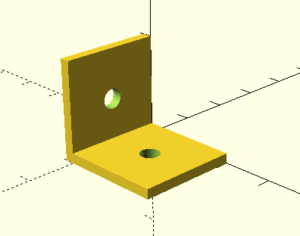
    Correction Exercise 3:

    //Exercise 3
    
    $fn = 100;
    
    difference(){
    
    translate([0,-20,0]) cube([20,20,2]);
    
    #translate([10,-10,-5]) cylinder(10,2,2);
    
    }
    
    difference(){
    
    translate([0,-20,0]) rotate([0,-90,0]) cube([20,20,2]);
    
    #translate([-5,-10,10]) rotate([0,90,0]) cylinder(10,2,2);
    
    }


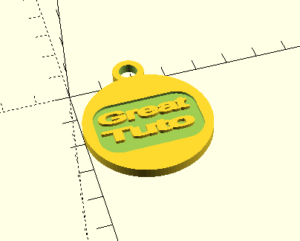
     Correction Final Exercises:

    //Final Exercise 1
    
    module Base(){
    
        difference(){
    
            cube([20,20,2]);
    
            translate([10,10,-5]) cylinder(10,2,2);
    
        }
    
    }


    union(){
    
        translate([0,-20,0]) Base();
    
        translate([0,-20,0]) rotate([0,-90,0]) Base();
    
    }


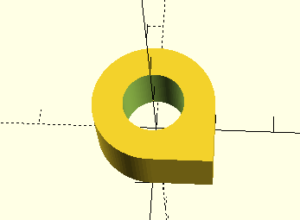
    //Final Exercise 2
    
    $fn = 100;
    
    //global variables
    
    hauteur = 3;
    
    rayon = 19;


    module ring(h,r){
    
        difference(){
    
            cylinder(h,r+0.8,r+0.8);
    
            translate([0,0,-1]) cylinder(hauteur+2,r*0.7,r*0.7);
    
        }
    
    }


    module Text(){
    
        linear_extrude(height=1) union() {
    
          translate([-2,0,0])resize([4.7,27])rotate([0,0,90])offset(0.7) text("Great","Arial:style=Bold");
    
          translate([5,0,0])resize([4.7,27])rotate([0,0,90])offset(0.7) text("Tuto","Arial:style=Bold");
    
        }
    
    }


    module Base(){
    
        translate([1,-rayon+5,3]) Text()
    
        cylinder(hauteur,19,19);
    
        difference(){   
    
            cylinder(hauteur,19,19); //base cylinder


            //encrusted text zone
    
            hull(){
    
                translate([-3,-9.5,2.1]) cylinder(1,6,6);
    
                translate([-3,9.5,2.1]) cylinder(1,6,6);
    
                translate([4,9.5,2.1]) cylinder(1,6,6);
    
                translate([4,-9.5,2.1]) cylinder(1,6,6);
    
        }
    
      }
    
    }


    //module calls
    
    union(){
    
            translate([rayon,rayon,0]) Base();
    
            translate([-rayon*0.13,rayon,0]) ring(3,4);
    
    }


  • Modelize your first 3D shape with openSCAD #5

    5. Modules

    Modules are used to define an object. It’s a very useful feature you must use in every of your projects. The principal advantage is to avoid code duplication and to have a more ridable code.

    Syntax:

    module Name(parameters) {
    
         “your code”
    
    }


    And to call the module: Name(parameters);


    Example:

    module Ecroue(h,r){
    
        difference(){
    
            cylinder(h,r+0.8,r+0.8);
    
            translate([0,0,-1]) cylinder(hauteur+2,r*0.7,r*0.7);
    
        }
    
    }
    
    Ecroue(3,4);


    6. Other Functionnalities

    Now you know all the basic functionalities there is a multiple of over one that can be very useful I can’t list them all but there is some that can interest you if you want to go further in openSCAD.


    a. Text

    To include text, you have 3 variables:

    • text(“myText”,”myStyle”) include your text
    • resize([x,y]) change the size of the text
    • offset(number) the width of the text


    syntax:

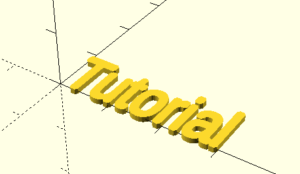
    resize([30,10]) offset(0.5) text("Tutorial","Arial:style=Bold");


    b. Minkowski

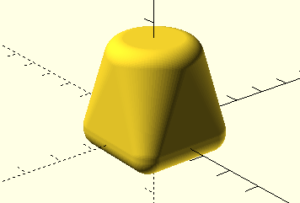
    Minkowski is a cool functionality that will allowed you to do shapes that are very hard to do with difference(). It will do very elegant shapes like this one:


    $fn=100;
    
    minkowski() {
    
       hull() {
    
           cube([20,20,1],center=true);
    
           translate([0,0,20]) cylinder(1,8,8);
    
        }
    
       sphere(r=5);
    
    }


    7. Final Exercises


    1) Try to reproduce the previous shape (Exercise 3) with modules. (correction)


    2)Do a key ring with a module for the key and on for the ring. In this key ring put text encrusted with a hull shape. (correction)


    8. Conclusion

    I hope you liked my tutorial and that it will help you for you 3d printing project. If you want some idea for your first shapes to print go check my creation in 3D models or on thinginverse who is a very cool website with a large database of 3D object created by the community.

    I will just finish with a topic on features I would personally like to be implemented on my favorite 3D creation software. For my part it will be very simple things like scroll past end, parenthesis and brackets handle to go faster when tiping.


  • Modelize your first 3D shape with openSCAD #4

    4. Good practice

    Like in all programing languages there is good practice you must do to ensure that everyone can understand your code and also to be easier to reread. In openSCAD it’s not so essential to do some of this good practice because the code is quite easy to understand but I definitely recommend you to do it.

    a. Commentary

    To do a commentary in openSCAD you can use // to comment 1 line or /* at the start and */ at end to comment an entire block of code.

    //this is a commentary
    
    Cube(10) //this is a cube
    /*
    
    hull() {
    
       cube([20,20,1],center=true);
    
       translate([0,0,20]) cylinder(1,8,8);
    
    }*/

    Commentary can be used to document your code or to comment code you don’t need for the moment.

    b. Indentation

    Indentation is when you do space in your code. Indentation is essential to have a clear code:

    hull() {
    
    ……………….cube([20,20,1],center=true);
    
    ……………….translate([0,0,20]) cylinder(1,8,8);
    
        }
    
    
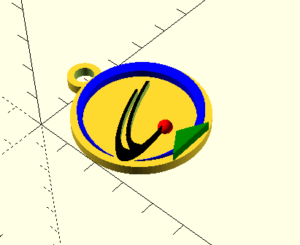
    scale([1.3,0.9,1])
    
    linear_extrude(height=2)
    
          difference() {
    
                difference() {
    
                       circle(r=18);
    
                       union() {
    
                              translate([0,2,0]) circle(r=14);
    
                              translate([-60,0,0]) square([60,60]);
    
                              translate([-40,-40,0]) rotate([0,0,55]) square([60,60]);
    
                              translate([-9,-14.2,0]) rotate([0,0,-20]) square([7,3]);
    
                           }
    
                 }
    
    }

    c. Global variables

    Global variables are in programming when you give at the beginning of the program a value that can be reused everywhere in your code. To do this you need to use the “=” operator with the syntax: name = value; .

    Example:

    my_height = 20;
    
    my_radius = 5;
    
    cylinder(my_height,19,19);
    
    sphere(my_radius)


    Global variables are very useful when you want for example the same height for your cylinder in your code and if one day you want to change it because your cylinders are to small, you just need to change the value of the variable and not of each cylinder.

    d. Colors

    One last good practice I like to do is to put colors on each of my objects to see them clearly in my view. The syntax for color is color(“your color”). Basic color like black, green, red… exist yet in the openSCAD kit but if you need more colors you can use RGB with this syntax : color([r,g,b,a]).

  • Modelize your first 3D shape with openSCAD #3

    3. Combining objects

    Create simple shapes is cool but we want to create more complexes objects by combining multiple shapes to render exactly what we want.


    a. Union

    First of all let’s do combination with using union():

    $fn = 100;
    
    union(){
    
        cube(10);
    
        cylinder(10,10,10);
    
    }


    b. Difference

    You will tell me what’s the point by doing a union of shapes? When you do difference, union becomes essential very fast.

    difference() will allowed you to suppress a part of a shape with an other shape, example:

    difference(){   
    
        translate([0,0,-1]) cylinder(20,5,5);
    
        cube(10);
    
    }

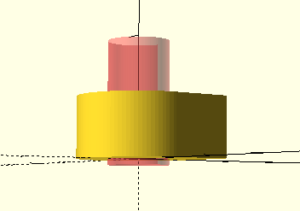
    Here we used a cylinder and removed matter from it with the angle of a cube. When you do a difference it’s always the first object who is display and the second one who is removed.

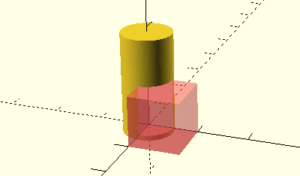
    Tip: sometimes the object became very complicated and we don’t see clearly the objects it’s why you can use the # at the beginning of the line to visualize the removed object.


    difference(){   
    
        translate([0,0,-1]) cylinder(20,5,5);
    
        #cube(10);
    
    }


    It’s why union is very useful because you can do a difference on a more complexes object, example:

    $fn = 100;
    
    difference(){
    
        union(){
    
            cube(10);
    
            cylinder(10,10,10);
    
        }
    
        translate([0,0,-1]) cylinder(20,5,5);
    
    }


    c. Hull

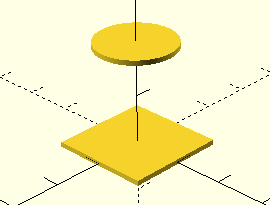
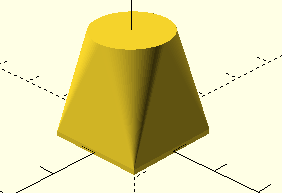
    A last functionality to combine shapes that can be very useful is hull(). With hull you can combine 2 shapes with a link, example:

    $fn=100;
    
    hull() {
    
       cube([20,20,1],center=true);
    
       translate([0,0,20]) cylinder(1,8,8);
    
    }


    d. Exercise 3

    Try to reproduce this shape (correction)


  • Modelize your first 3D shape with openSCAD #2

    2. Moving and changing our objects


    a. Translations

    Now you know how to create shapes you maybe want to change their position in the view. It’s why we’ll use translate and rotate.

    To move a shape you just need to do a translate([x,y,z]), example :

    On the x axe :

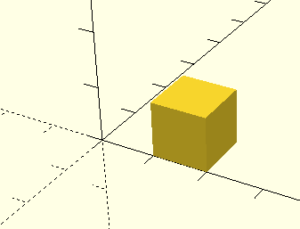
    translate([10,0,0]) cube(10);


    On the y axe :

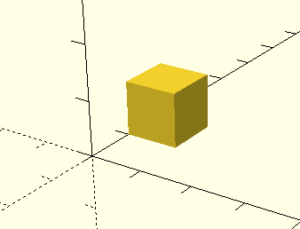
    translate([0,10,0]) cube(10);


    On the z axe:

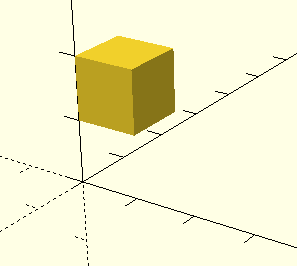
    translate([0,0,10]) cube(10);


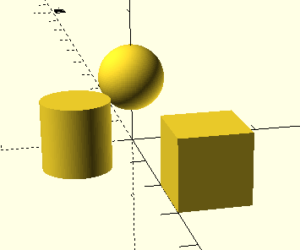
    $fn = 100;
    
    translate([20,0,0]) cube(10);
    
    translate([10,-10,0]) cylinder(10,5,5);;
    
    translate([0,0,10]) sphere(r=5);


    b. Rotations

    The rotation is the same thing then translation instead we work with degrees (syntax : rotate([x,y,z])):

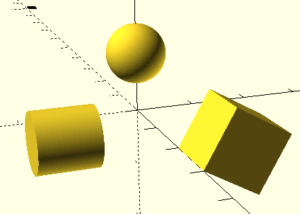
    $fn = 100;
    
    translate([20,0,0]) rotate([-30,0,0]) cube(10);
    
    translate([10,-10,0]) rotate([90,0,0]) cylinder(10,5,5);;
    
    translate([0,0,10]) sphere(r=5);

    The rotation is around an axe. Look at the cube we made a rotation of 30 degrees around the x axis but we go in the over direction with a -30 instead of just 30.


    c. Scale

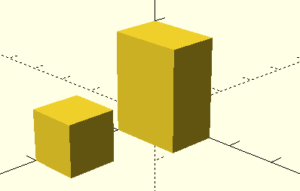
    A very interesting function when manipulating your shapes is scale(). Scaling will allow you to change the dimension of your shape by multiplication factors, example:

    translate([20,0,0]) cube(10);
    
    scale([1,1.5,2]) cube(10);
    
    scale([1,1.5,2]) //this function multiple x by 1, y by 1.5 and z by 2.


    d. Exercise 2

    Try to reproduce this shape (correction)


  • Modelize your first 3D shape with openSCAD #1

    You decide to learn 3D modeling and start to print your first 3D shape this introduction course is made for you.
    This tutorial will allow you to create simple 3D shapes for 3D printing with using openSCAD a free open source software. I tried to do a tutorial the simple as possible with a lot of pictures to be understandable by everyone even beginners in computer science or 3D printing.
    I personally like to use OpenSCAD because this language is very simple, cross platform and easy to share: it’s not heavy it’s only text. But most of all because it allows me to create simple shapes in a very low amount of time.

    First of all go check the link bellow to download openSCAD : http://www.openscad.org/downloads.html


    Summary

    1. Create your first shapes
      • Cube
      • Cylinder
      • Sphere
      • Exercise 1
    2. Moving and changing our objects
      • Translations
      • Rotations
      • Scale
      • Exercise 2
    3. Combining objects (Union, hull and difference)
      • Union
      • Difference
      • Hull
      • Exercise 3
    4. Good practice
      • Commentary
      • Indentation
      • Global variables
      • colors
    5. Modules
    6. Other functionalities
      • Text
      • minkowski
    7. Final Exercises
    8. Conclusion
    9. Correction


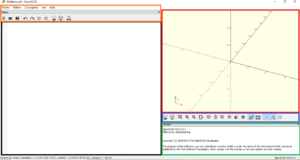
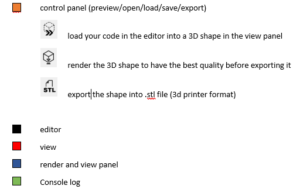
    Interface

    For more help and details on syntax and functionalities don’t hesitate to check the CheatSheet that you can access directly in the Help menu in the control panel or at this link : http://www.openscad.org/cheatsheet/index.html?version=2015.03 .


    1. Create your first shapes

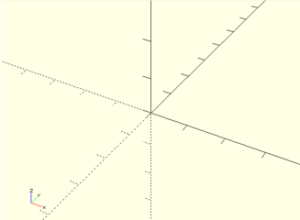
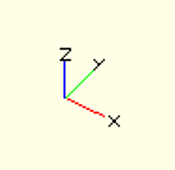
    This is the view where your code will be transformed into a 3D shape. The most important thing for you to know is that we have 3 perpendicular axis (x,y,z) which will allow us to give the proper dimension to our shapes in every direction.


    a. Cube

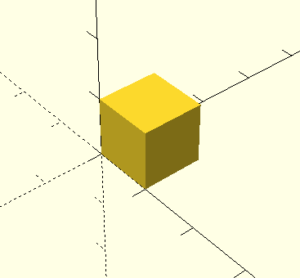
    Start to create a cube syntax is: cube([width,depth,height]) or cube([x,y,z])

    cube([10,10,10]);


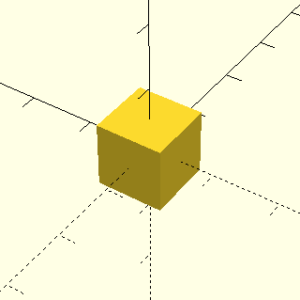
    Automatically certain shape like the cube will appear in [0;0]. If you want it to be centered, you just need to add center = true.

    cube([10,10,10], center = true);


    b. Cylinder

    For a cylinder the syntax is cylinder(h,r|d,center)

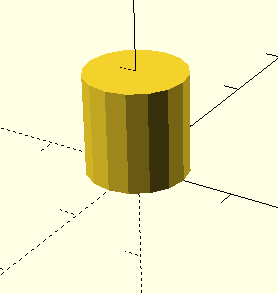
    cylinder(10,5,5);


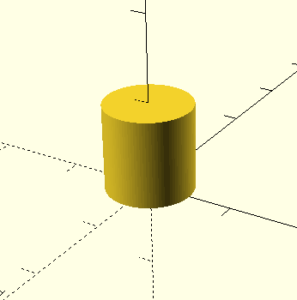
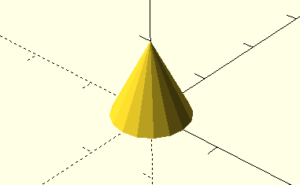
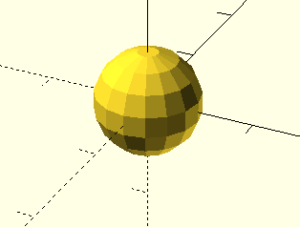
    As you can see our cylinder is not perfect his shape is a bit cubic it’s why I encourage you to add $fn = number; at the beginning of your code. $fn or face number will make your shapes smoother but be carful don’t put a to high number overwise the render before exporting your shape is gone be very slow.


    $fn = 100;
    
    cylinder(10,5,5);


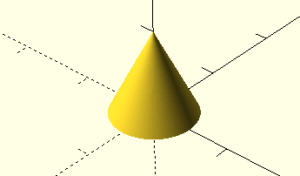
    You can also do a cone with a cylinder

    $fn = 100;
    
    cylinder(10,5,0);


    with $fn                                                                    without $fn


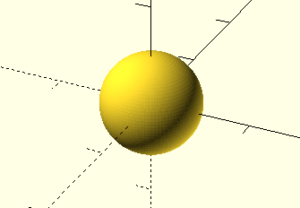
    c. Sphere

    For a sphere the syntax is sphere(radius)

    $fn = 100;
    
    sphere(r=5);


    with $fn                                                                    without $fn


    d. Exercise 1

    Go on the CheatSheet and try all the different shapes. Try to do a rectangle and change the different query of the cylinder to understand how it works.